Senin, 26 Desember 2011

Resep Cake: Cranberry Almond Brownies

Resep Cake: Cranberry Almond Brownies
Foto: Dikhy Sastra
Jakarta - Tak pernah bikin kue? Cobalah buat brownies yang super gampang ini. Praktis dan bahkan Anda tak perlu mengocoknya. Semua bahan tinggal dicampur lalu dipanggang. Lihat saja hasilnya? Renyah, chewy, legit sedikit asam.

Bahan:
175 g mentega tawar
200 g dark cooking chocolate, potong kecil
150 g gula pasir
4 butir telur ayam
150 g chocolate chips
100 g cranberry kering
150 g almond berkulit, belah
Ayak jadi satu:
125 g tepung terigu
1 sdt baking powder
50 g cokelat bubuk

Cara membuat:


  • Siapkan loyang segi empat 20 cm, semir mentega dan taburi tepung.
  • Tim mentega dan cokelat hingga leleh.
  • Aduk-aduk hingga hangat.
  • Tambahkan gula, aduk hingga gula larut.
  • Masukkan telur satu per satu sambil aduk hingga rata.
  • Tambahkan campuran tepung, aduk rata.
  • Masukkan chocolate chips, aduk rata.
  • Tambahkan sebagian almond dan cranberry, aduk rata.
  • Tuang adonan ke dalam loyang, ratakan.
  • Taburi sisa cranberry dan almond.
  • Panggang dalam oven panas 180 C selama 45 menit.
  • Angkat dan dinginkan.
  • Potong-potong, sajikan.
Untuk 20 potong

Kalori : 4915,1 kkal - 245,7 kkal/potong
Protein : 66,5 g - 3,33 g/potong
Karbohidrat : 449,6 g - 22,48 g/potong
Lemak : 345,5 g - 17,28 g/potong
Serat : 219,7 g - 10,99 g/potong
http://www.detikfood.com/read/2011/12/16/121736/1792707/1037/resep-cake-cranberry-almond-brownies

Resep Cake : Green Fruitcake

Resep Cake : Green Fruitcake
Foto: Dikhy Sastra
Jakarta - Cake buah yang satu ini tidak terlalu padat tetapi punya rasa sedikit asam segar karena tambahan buah kiwi kering dan ceri. Jika ingin lebih enak, buatlah satu atau dua hari sebelum dimakan. Cocok buat sajian spesial di hari Natal nanti.

Bahan:
50 g ceri hijau, potong kecil
150 g kismis
100 g manisan kiwi, potong kecil
2 sdm rhum/Kirsch
175 g mentega tawar
175 g gula pasir halus
½ sdt kulit jeruk lemon parut
3 butir telur ayam
Ayak jadi satu:
275 g tepung terigu
1 sdt soda kue
1 sdt baking powder
Hiasan:
100 g ceri hijau
100 g manisan kiwi
2 sdt gula bubuk

Cara membuat:


  • Aduk ceri, kismis dan kiwi dengan rhum hingga rata. Biarkan beberapa saat hingga lunak dan lembap.
  • Kocok mentega, gula dan lemon hingga lembut.
  • Masukkan telur satu per satu sambil koock terus hingga lembut.
  • Masukkan campuran terigu, aduk hingga rata.
  • Aduk campuran buah dengan seidkit tepung terigu hingga rata.
  • Campurkan dalam adonan, aduk rata.
  • Tuang ke dalam loyang, ratakan.
  • Panggang dalam oven panas 180 C selama 60 menit.
  • Angkat dan dinginkan.
  • Hiasi dengan ceri dan kiwi.
  • Taburi gula bubuk.
Untuk 16 potong

Kalori : 5405,5 kkal - 337,8 kkal/potong
Protein : 52,67  g - 3,3 g/potong
karbohidrat: 523,2 g - 32,7 g/potong
Lemak : 166,45 g - 10,40 g/potong
Serat : 202,45 g - 12,65 g/potong
http://www.detikfood.com/read/2011/12/14/112910/1790841/1037/resep-cake-green-fruitcake

Resep Kue: Men's Cookies

Resep Kue: Men's Cookies
Foto:detikfood
Jakarta - Kue yang satu ini banyak mengandung mineral penting buat pria. Karena 3 jenis bijian yang membalut kue ini punya banyak mineral penting buat pria. Rasanya renyah krenyes gurih. Makin asyik dinikmati dengan secangkir kopi. Bikin buat suami yuk!

Bahan:
240 g mentega tawar
100 g gula bubuk
1 butir telur ayam
150 g mixed seed (flaxseed, sunflowerseed, sesame seed)*)
100 g kismis
Ayak jadi satu:
300 g tepung terigu
1 sdt soda kue

Cara membuat:


  • Biarkan mentega dalam suhu ruangan hingga agak lunak.
  • Kocok mentega bersama gula hingga rata.
  • Masukkan telur, kocok rata.
  • Tambahkan campuran tepung, aduk rata.
  • Simpan adonan dalam wadah tertutup di lemari es hingga agak keras.
  • Bentuk adonan menjadi bola-bola kecil.
  • Lapisi dengan campuran mixed seed.
  • Susun di atas loyang datar. Beri 1 buah kismis di atasnya, sambil tekan hingga lengket.
  • Panggang dalam oven panas 170 C selama 20 menit.
  • Angkat dan dinginkan.
Untuk 800 gram

*)Bisa dibeli di toko bahan kue
http://www.detikfood.com/read/2011/10/18/110533/1746458/1037/resep-kue-mens-cookies

Resep Kue: Putu Mayang

Resep Kue: Putu Mayang
Foto:Syahroni
Jakarta - Menyantap kue tradisional memang asyik. Selain bahannya sederhana, rasanya yang legit dengan aroma daun pandan yang harum membuat kue ini selalu bikin kangen. Enak dimakan dingin atau hangat.

Bahan:
200 g tepung beras
2 sdm tepung kanji
250 ml air
100 ml air daun pandan suji
Saus Santan:
750 ml santan sedang
200 g gula merah, sisir halus
3 sdm gula pasir
1 lembar daun pandan, potong-potong

Cara membuat:


  • Campur kedua tepung jadi satu.
  • Perciki dengan sedikit air hingga tepung jadi lembap.
  • Alasi kukusan dengan daun pisang. Kukus tepung hingga panas. Angkat.
  • Didihkan sisa air dan air daun pandan suji.
  • Masukkan tepung panas, aduk-aduk hingga licin dan kental. Angkat.
  • Bagi menjadi 3 bagian. Satu bagian dengan pewarna merah, satu bagian dengan warna hijau. Biarkan sisanya berwarna putih.
  • Tuang ke dalam cetakan kue putu.
  • Tekan hingga bergelombang. Taruh di atas daun pisang.
  • Kerjakan hingga bahan habis.
  • Saus Santan:
  • Rebus semua bahan hingga mendidih dan gula larut. Angkat dan saring.
  • Sajikan putu dengan Saus Santan.
Untuk 6 porsi

Kalori : 2139,7 kkal - 356,6 kkal/potong
Protein : 22,13 g - 3,9 g/potong
Karbohidrat : 436,6  g - 72,8 g/potong
Lemak : 37,15 g - 6,2 g/potong
Serat : 457,2 g - 76,2 g/potong
(Odi/Odi)
 http://www.detikfood.com/read/2011/12/21/170155/1796841/1037/resep-kue-putu-mayang?

Resep Daging: Steak BBQ Saus Jamur Nanas

Resep Daging: Steak BBQ Saus Jamur Nanas
Foto: Saptaning Aellyana
Jakarta - Resep ini merupakan modifikasi dari resep steak BBQ yang biasa.  Pengolahan daging dan bahan saus saya ganti dengan bahan yang ada di rumah. Ternyata rasanya menjadi unik dan lezat. Cobain yuk!

Bahan Steak:

500 g daging has dalam sapi, iris tipis
5 sdm saus barbeque botolan
1/2 sdt bawang putih bubuk
2 sdm minyak wijen
1 sdt biji wijen sangrai, untuk taburan
Bahan Saus Jamur Nanas :
2 sdm mentega untuk menumis
100 g jamur kancing, iris tipis
75 g  nanas kupas, parut
2 siung bawang putih, cincang halus
50 g bawang bombay, cincang halus
65 ml santan kental
1 sdt gula pasir
1/2 sdt garam
1/4 sdt merica bubuk
1/4 sdt lada bubuk
1 sdt tepung maizena, larutkan dengan 2 sdm air matang

Cara Membuat :

  • Saus : Panaskan mentega di dalam wajan.
  • Masukkan bawang putih dan bawang bombay, tumis hingga  harum.
  • Masukkan jamur, aduk sebentar.
  • Tuangkan santan, tambahkan gula pasir, garam, merica dan lada.
  • Masak hingga santan mendidih. Masukkan nanas dan air larutan maizena, aduk hingga kuah santan mengental. Angkat.
  • Steak: Campur saus barbeque, bubuk bawang putih dan minyak wijen.
  • Masukkan daging, aduk hingga merata. Diamkan selama 1 jam agar bumbu meresap.
  • Panggang daging di atas panggangan atau di atas bara api hingga matang.
  • Angkat, taburi dengan biji wijen.
  • Hidangkan daging steak  dengan saus jamur nanas.
Untuk 3 orang
(dev/Odi)
http://www.detikfood.com/read/2011/02/02/161230/1559154/366/resep-daging-steak-bbq-saus-jamur-nanas

Resep Donat Enak Empuk

Resep Donat Enak Empuk – Siapa yang tak mengenal makan ini, hehe. Yak, donat merupakan jajanan atau makanan yang sangat familiar bagi masyarakat Indonesia. Kita banyak menemukannya di segala tempat, entah itu di pasar, di kantin sekolah, di mal, dan lain-lain. Donat sendiri mempunyai keunikan sendiri dengan berbagai bentuk yang ada. Yang kita umum ketahui adalah donat yang bentuknya seperti cincin, atau dengan kata lain berlubang tengahnya. Namun, sekarang banyak kita jumpai juga donat yang berbentuk bulat ppenuh, terkadang juga diberi tambahan penghias agar donat terlihat cantik dan menarik bagi siapapun yang melihatnya, hehe. Tetapi bagaimana jika kita bisa membuat sendiri makanan dan bentuk donat itu sendiri, pasti merasa puas bukan :D
Berikut ini akan saya sampaikan tentang Resep Donat Enak Empuk =
Bahan:
  • 500 gr tepung terigu cakra (atau yang bagus/protein tinggi lah)
  • 1 bks (11 gr) ragi instan
  • 4 kuning telur ayam
  • 200 ml gr susu bubuk atau susu kental
  • 100 gr gula pasir
  • 100 gr margarin
  • 5 butir kuning telur
  • ½ sdt garam
  • 200 gr kentang, lalu dikukus dan dihaluskan
  • 100 ml air dingin
  • minyak untuk menggoreng
Olesan donat:
100 g cokelat batang, kemudian lelehkan
100 g meses/cokelat padat yang dilelehkan
Cara membuat :
  1. Kocok 4 butir kuning telur
  2. Campur tepung terigu dan ragi, aduk rata kemudian masukkan ke adonan
  3. Masukkan gula pasir, susu, mentega, terigu. Lalu aduk rata.
  4. Tuangkan susu sedikit demi sedikit sambil menguleni hingga setengah kalis. Kemudian beri garam dan mentega kemudian aduk lagi sampai kalis,dan kemudian diamkan dalam wadah terutup sekitar 30menit, hingga adonan mengembang.
  5. Bulatkan adonan menjadi tiap-tiap bulatan, ukuran tergantung selera, lalu taruh di loyang beroleskan minyak selama 20 menit hingga bulatan adonan kelihatan mengembang lagi. Setelah itu, buat lubang di tengah
  6. Panaskan minyak goreng yang banyak agar donatnya bisa matang dengan bagus. Kondisi api harus kecil, agar proses pematangan lebih terasa. Gorenglah donat hingga berwarna kecoklatan dan matang. Kemudian, angkat dan tiriskan. Diamkan sejenak, kemudian setelah dingin permukaan donat dapat diolesi dengan cokelat leleh dan ditaburi cokelat. Diamkan sampai mengeras, barulah bisa siap untuk disajikan :)
Bisa juga perhatikan hal-hal berikut ini :
  • Pada saat menggoreng, bisa digunakan kayu atau sumpit untuk memperbaiki lubang donat agar terlihat bagus.
  • Untuk membuat DONAT KENTANG, prosesnya juga sama, tinggal kita mencampurkan halusan kentang yang sudah didinginkan ke dalam adonan (langkah 3&4)
  • Untuk hiasan donatnya tergantung selera masing-masing, bisa mentega dan ditaburi meises ceres diatasnya. Selain itu, bisa juga donat dicelup dalam dark cooking chocolate yang telah ditim dan dihiasi white cooking chocolate. Sajian donat juga bisa dikasih taburan gula halus, atau gula halus campur mentega dengan perbandingan 4 : 1 (4sdm gula halus, 1 sdm mentega, aduk rata dan olesi diatas donat).
  • Untuk DONAT KENTANG, olahan kentang halus harus dicampurkan waktu olahan kentangnya dingin, karena kalau tidak dingin, wah raginya bisa langsung mati.
Demikianlah resep donat enak empuk yang dapat saya sampaikan, semoga bermanfaat bagi Anda yang ingin mencari resep membuat donat yang lezat, hehe. Selamat mencoba dan semoga sukses :D . Bagi Anda yang ingin mengetahui juga berbagai wacanaa yang lain, Anda bisa juga melihatnya di situs ini, karena Semua Ada Di Sini:) 
http://lintasterbaru.com/resep-donat-enak-empuk.html

Kamis, 22 Desember 2011

Pennylane Chocolate Cookies

Posted by:  /  Category: Resep Kue
Pennylane Chocolate Cookies
Bahan:
  • 100 gram almond + 100 gram kenari, atau 200 gram kacang-kacangan favorit anda
  • 60 gr terigu protein rendah
  • 1 sdt baking powder
  • 1/4 sdt garam
  • 2 sachet (@ 4 gr, total 8 gram) kopi instan, larutkan dengan beberapa tetes air panas
  • 450 gram dark cooking chocolate (Rasa kue ini 99% ditentukan oleh rasa coklat yang digunakan, maka gunakan coklat favorit anda yang betul-betul enak rasanya)
  • 60 gram unsalted butter atau margarine
  • 250 gram gula pasir
  • 4 butir telur
  • 1 sdm vanila ekstrak
  • 175 gram dark chocolate chips
  • 175 gram white chocolate chips (bisa dikurangi atau diganti jika tidak terlalu suka manis)
Cara Membuat:
  1. Lelehkan coklat bersama mentega, sisihkan.
  2. Campur terigu dan baking powder.
  3. Campur larutan kopi dengan garam dan vanila ekstrak.
  4. Kocok telur dan gula hingga kental, pucat/putih, berjejak, atau jika kocokan diangkat adonan akan jatuh dalam bentuk pita lebar yang mengalir pelan.
  5. Masukkan coklat+butter leleh, aduk rata. Masukkan campuran kopi, aduk rata. Ayakkan terigu+BP, aduk asal tercampur. Masukkan kacang panggang dan kedua macam chocolate chips, aduk.
  6. Tutup mangkuk dengan plastik lengket, dinginkan di kulkas lk 30-60 menit jam hingga adonan mudah disekop.
  7. Panaskan oven 170 derajat celcius.
  8. Sekop atau sendokkan adonan ke atas loyang yang sudah dialasi baking paper atau silicone mat. Agar bentuknya konsisten, gunakan sekop es krim, yang kecil atau sedang sesuai selera. Beri jarak cukup lebar, karena nanti dia melebar sendiri.
  9. Panggang hanya sampai bagian atasnya kering dan retak-retak saja, kurang lebih 10-12 menit. Jangan terlalu lama memanggang, nanti kering, kurang asik :)
  10. Angkat, letakkan loyang di rak hingga agak dingin dan kue mengeras. Angkat kue, dinginkan sepenuhnya di atas rak.
Catatan:
  • Jika adonan telur sulit mengental, tambahkan 1 sdt emulsifier untuk membantu.
  • Jika hasil kue terlalu pipih, kemungkinannya adalah adonan telur kurang kental atau suhu oven kurang panas.

Coco Crunch Chocolate Chips Cookie

Posted by: Koki  /  Category: Resep Masakan
Bahan:
  • 100 gr Nestle COCO CRUNCH, blender halus.
  • 50 gr coklat chips
  • 300 gr mentega
  • 250 gr gula halus
  • 4 btr kuning telur
  • 350 gr tepung terigu
  • 30 gr tepung maizena
  • 40 gr susu bubuk DANCOW full cream
  • 1 sdt Baking powder (BP)
Cara membuat:
  1. Campur tepung terigu, tepung maizena, ayak, sisihkan.
  2. Kocok mentega dan gula hingga lembut, tambahkan telur kocok cepat, tuang BP, kocok lagi satu menit.
  3. Masukkan campuran terigu, aduk rata, tuang coco crunch dan choklat chips, aduk rata.
    Bentuk bulatan dan susun diatas loyang yang sudah dipoles mentega tipis, beri jarak satu dengan lainnya, tekan perlahan dengan garpu.
  4. Panggang dalam oven hingga matang. Lk. 30 menit dengan suhu 150C.
Tips: coklat chips dapat juga ditata sebagai hiasan diatas cookies selain dicampur kedalam adonan.

Strawbery Cookies

Cocok untuk dijadikan teman untuk bersantai dengan keluarga maupun saat santai bersama sahabat.

Sumber : Tabloid Aura

Kategori Masakan : Kue

Bahan-Bahan :
3 butir telur, diambil hanya putihnya saja.
125 gram gula pasir
150 gram mentega-cairkan di dalam wadah diatas air panas
250 gram tepung terigu
3 sendok makan selai stroberi
3 sendok makan stroberi

Cara Mengolah :


1. Kocok Putih telur, gula pasir dan mentega cair.
2. Campurkan tepung terigu sedikit demi sedikit sambil diaduk.
3. Tambahkan essens stroberri, aduk rata.
4. Tuangkan ke loyang cookies.
5. Panggang dalam oven.
6. Setelah matang, beri selai stroberi diatas masing-masing kue.
Sumber / dikutip dari : Resepkita.com

Senin, 12 Desember 2011

Meyer Lemon Cranberry Cupcakes

Posted by chockylit in General (Sunday January 3, 2010 at 4:16 pm)
Meyer Lemon Cranberry Cupcakes
I closed out 2009 with some major procrastination… I am just now getting to this belated post.
I made these cupcakes for a party where I knew there would be an abundance of sweet and chocolatey desserts. I thought the tartness of cranberries and lemon would be a nice counterpoint. That was indeed the case. I saw many adults who would normally not be inclined towards a cupcake struggling with their cupcake paper.
The cranberry filling is fairly tart and very forward. The meyer lemon is secondary to the cranberry but definitely present. The cupcake was all around tart and sweet and pleasant to eat.
Here’s to a cupcake filled 2010!
Tart Cranberry Filling

1 12 ounce bag of fresh cranberries
1 cup water
1/2 cup sugar
1. Rinse and pick through cranberries.
2. Add to a medium pan with water and sugar. Bring to a boil stirring to dissolve sugar.
3. Let the mixture boil for ten minutes.
4. Remove from heat and allow to cool.
5. Store in the refrigerator for 2 hours or overnight.
Lemon Cupcakes
~28 regular cupcakes / 375 degree oven

1 cup (2 sticks) unsalted butter, room temperature
2 cups sugar
4 large eggs
2-3/4 cups all-purpose flour
1-1/2 teaspoons baking powder
1/8 teaspoon salt
3/4 cup milk
1/4 cup meyer lemon juice
zest of one meyer lemon
1. Beat butter on high until soft, about 30 seconds.
2. Add sugar. Beat on medium-high until light and fluffy, about 3 minutes.
3. Add eggs one at a time, beat for 30 seconds between each.
4. Whisk together flour, baking powder, and salt in a bowl.
5. Add about a third of the dry ingredients to the mixing bowl and beat to combine. Add about a half of the milk and beat to combine. Continue adding, alternating between dry and wet and finishing with the dry.
6. Add the lemon juice and lemon zest, beat to combine.
7. Scoop into cupcake papers about half full.
8. Place cupcakes in the oven and turn the oven down to 350 degrees. Bake for 22-25 minutes until a cake tester comes out clean.
Meyer Lemon Cranberry Cupcake
Meyer Lemon Cream Cheese Frosting

2 sticks (1 cup) butter, room temperature
1-1/2 packages of Philly cream cheese
3-4 cups sifted powdered sugar
1 tablespoon meyer lemon juice
zest of one half meyer lemon
1. Beat butter at medium speed until creamy.
2. Add cream cheese and beat until combined.
3. Sift 3 cups of the powdered sugar into the butter and cream cheese. Add the lemon juice and zest. Beat until combined.
4. Add more sugar until you get to the consistency and sweetness you like. I used 4 cups.
Meyer Lemon Cranberry Cupcake
Assemble
1. Fill the cooled cupcakes using the cone method.
2. Frost.
3. Top off with sparkling cranberries (I made a half batch of these) or marshmallow snowpeople.

Cream filled vanilla cupcakes with ganache glaze and coconut

Posted by chockylit in General (Friday January 22, 2010 at 12:03 am)
lamington cupcakes
These cupcakes were inspired by Mr. P’s lamington challenge. Mr. P happens to come from Cardiff and I was making cupcakes for coworkers from Cardiff! It was kismet really. I had to do it.
Lamingtons are Australian and are a cube of cake coated in chocolate and rolled in coconut. What I am presenting here are indeed not lamingtons, but cupcakes inspired by them. I made two versions of these cupcakes, both with cream, but one with vanilla sea salt and one with blackberry jam. I did this mostly because I wanted to present both bittersweet chocolate and white chocolate frosted cupcakes. It’s easy enough to change up the fillings with whatever you have. I happened to have Welsh vanilla sea salt
I also opted for a denser cupcake recipe as I wanted a slight dome given I was only glazing the cupcake. In the end I wasn’t super excited by the cupcakes and here is why. I like a lot of frosting. A thin coating of chocolate just doesn’t cut it for me. A cupcake really isn’t a cupcake without 2 inches of delicious frosting piled on top. The next recipe I do will have just that…
Vanilla Cupcakes from Martha Stewart
24 regular cupcakes / 350 degree oven
3 cups all-purpose flour
1-1/2 teaspoon baking powder
3/4 teaspoon salt
16 tablespoons (2 sticks) unsalted butter, room temperature
2 cups sugar
6 large eggs
3 teaspoons pure vanilla extract
1-1/2 cups milk
1. Preheat the oven to 350°.
2. In a medium bowl, sift together flour, baking powder, and salt. In the bowl of an electric mixer fitted with the paddle attachment, cream butter and sugar until light and fluffy. Add eggs, one at a time; scrape down bowl, and beat in vanilla.
3. Add flour mixture and milk alternatively, beginning and ending with flour mixture.
4. Divide batter evenly among cupcake liners, about three-quarters full each. Bake until golden and tops spring back to touch, about 20 minutes, rotating pan once if needed. Transfer pans to wire rack; cool completely.
blackberry jam and cream filled cross section
Whipped Cream
1 cup heavy cream
2 tablespoons sugar
1. Whisk cream until soft peaks form.
2. Add sugar and whisk until combined.
White and Dark Chocolate Ganache Glaze
6 tablespoons unsalted butter at room temperature
3.5 ounce bittersweet chocolate, coarsely chopped
3.5 ounce white chocolate, coarsely chopped
1 teaspoon vanilla
1. Divide the butter in half (two 3 tablespoon portions).
2. Put the chopped chocolates in two bowls. White in one and bittersweet in the other.
3. Put about half of the half portion of butter into each bowl (~1.5 tablespoons in each bowl).
4. Place the bowls over a pan of simmering water (I did one at a time) and let rest for 30 seconds.
5. Mix the chocolate and butter until melted and smooth.
6. Add the reminaing butter from the 3 tablespoon portion, 1/2 teaspoon vanilla, and mix to combine.
7. Let cool 15-20 minutes, stirring occasionally, until thick enough to spread. Repeat with the other chocolate
lamington cupcakes
Assemble
1/2 cup dried, unsweetened coconut
1/4 cup blackberry jam
~ 2 teaspoons vanilla sea salt, purchased or made with sea salt and vanilla bean
1. Fill the cupcakes with cream using the cone method. This post has step by step photos of the method. I fill half with cream and a pinch of vanilla sea salt and half with cream and blackberry jam.
2. Top the vanilla sea salt and cream filled ones with bittersweet chocolate and sprinkle with coconut.
3. Top the blackberry jam and cream filled ones with white chocolate and sprinkle with coconut.
lamington cupcakes

Chocolate Cupcakes with Strawberry Frosting plus Tips & Tricks for Successful Cupcake Baking with Butter Based Recipes

Posted by chockylit in General (Friday February 12, 2010 at 11:51 pm)
chocolate cupcakes with strawberry buttercream frosting
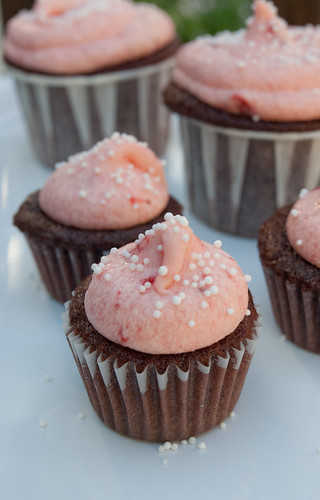
There is nothing terribly exciting or novel about this recipe. It’s my standard chocolate cupcake recipe with strawberry frosting. Boring, no? Well, what I intend to do with this post is to articulate all those little tips & tricks that I know from experience/reading, but never include in a condensed recipe. Some of this is covered in my “basics & troubleshooting” section, but I thought it would be of use to describe these tips & tricks in the narrative of a recipe.
It all started a couple of weeks ago when I wrote out the recipe for my chocolate cupcakes. This is what I want to do if I plan to be very careful and not miss anything. I find its easier to follow and I can check off things as I add them.
recipe with tips & tricks
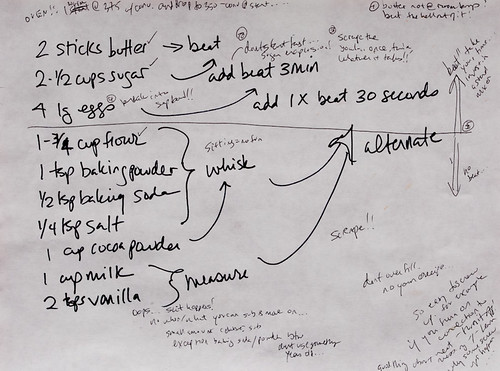
Then I had the idea to write down the little things I was doing that normally don’t end up in a recipe and explanations for certain aspects of the recipe. Hence the idea was born. So, no formal looking recipe in this post. Just a story…


Beat 2 sticks of butter until soft.
butter
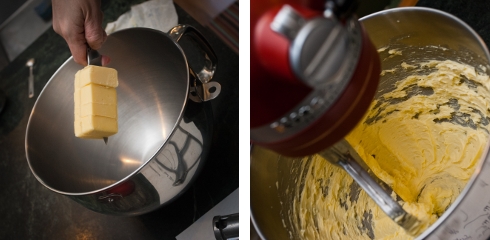
First off – the butter. Every recipe says it, but do we always pay attention? ROOM TEMPERATURE. I really can’t stress enough just how important this step is. I have been disappointed before… About to start baking only to remember that I forgot to take out the butter hours earlier. But really – the best thing to do? Wait it out. An alternative? Beat the hell out of the butter all by itself, scraping down a few times in between beatings. Why? If the butter isn’t soft it won’t get all nicely cut up by the sugar and distributed evenly in the batter. You might just end up with little pools of it melting in your end result. I have had it happen. But whatever you do, don’t microwave the butter. It will just melt and melted butter is useless to you.


Add 2-1/2 cups of sugar and beat until light and fluffy.
sugar
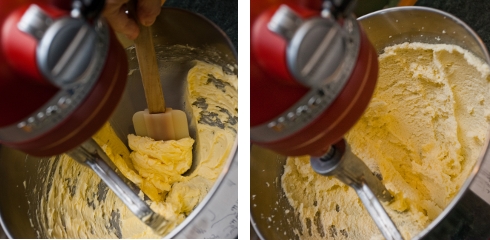
Most butter-based recipes say this as well. Beat until light and fluffy. Beat for 3 minutes. Etc. But do you always? Why 3 minutes? Why not 2 or 4? What is light and fluffy? Bottom line? You want to beat that butter well. You want it cut up into tiny, tiny pieces by the grainy sugar so it doesn’t end up into little pools compromising the structure of your wonderful cupcakes. So, beat away! Turn on your mixer and have a glass of wine! Scrape down the bowl and beat some more. (Sometimes mixers leave a thin layer of butter untouched… once that gets folder into your batter you could be in trouble!)


Add 4 large eggs, one at a time, beating well between each.
Similarly, you want the eggs incorporated very well. Basically when you are baking things like cupcakes, you DON’T want to beat the batter once the flour is in (it will toughen them up) but you DO want to beat the ingredients so they are well incorporated. So, beat the butter, sugar, and eggs as much as you can (without going overboard). Now is the time for beating.


Whisk together 1-3/4 cup flour, 1 tsp baking powder, 1/2 tsp baking soda, 1/4 tsp salt, and 1 cup unsweetened cocoa powder
dry
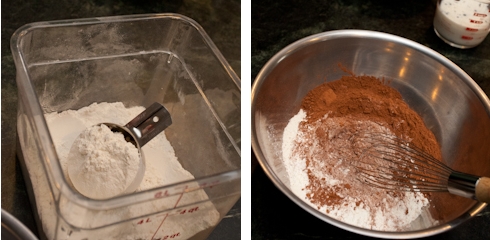
This part is easy! Many recipes mention sifting, but sifting is a pain. I have never noticed a difference with whisking and whisking is easier to do. So, I whisk. The goal is to just get everything mixed together and any lumps removed. As an aside, I use these restaurant style containers to store dry goods and its very convenient for scooping stuff out without making a mess. And I know I should weigh the dry ingredients, but there is something inherent in me that requires I go only SO far when it comes to baking.


Measure out 1 cup of whole milk and 2 teaspoons vanilla.


Alternate adding the dry ingredients and wet ingredients mixing to incorporate between batches.
So what is with this step? It’s always a little complicated to write down. Some recipes are very specific about adding 1/3 dry ingredients, mixing, adding 1/2 wet ingredients, mixing, 1/3 dry ingredients, and so on. Is there something magical about these proportions? Doubtful. What you want to avoid is dumping everything in and having to beat and beat to get it mixed up, because word on the street (ok, I never tried this…) is that doing so will make your cupcakes tough. The idea being the glutens get over beaten. Whether this is exaggerated, I do not know, but with many of the other steps described above, I have screwed up and have seen the unfortunate results. So I am leaning towards this being a good thing to follow. One day I should over-beat some and see what happens.


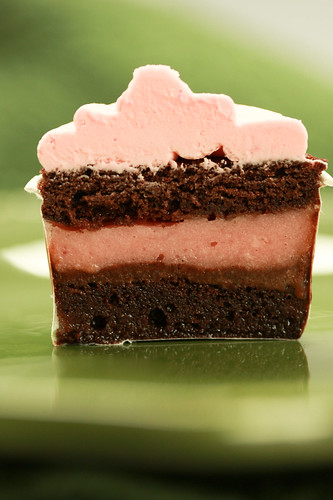
Scoop batter into cupcake papers 1/2 full.
done
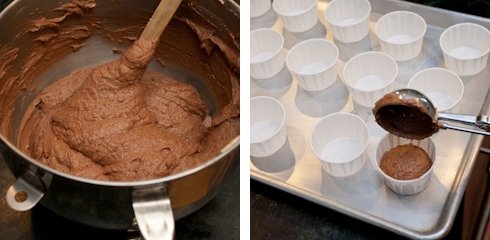
This step gets me thinking about a few things. First, every recipe is different. So if something goes wrong with a recipe or a cupcake comes out with a dome or without a dome, it all really depends. The more flour there is proportionally, the more structure the cupcake will have, the less likely it will be to sink, the more likely it will have a dome, and the more batter you can put in the cupcake paper (like 2/3s to 3/4s full). But these cupcakes, while more fool proof, are also denser and not as soft. The less flour, the less structure, the more likely it will overflow or sink, the less likely it will have a dome, and the less batter you can put in the cupcake paper (1/2 full at most). BUT these cupcakes will be soft, fluffy, and in my opinion superior… By the way, ice cream scoops are really absolutely necessary. They make filling the papers a breeze…
This chocolate cupcake recipe is a result of my experimentation in trying to get the cupcake to be as delicate as possible and as chocolately as possible without being a complete disaster. That said, you need to be careful. Don’t, I repeat, DON’T overfill the papers. And DO make sure your oven is at the temperature it says it is. If you are super concerned, add another 1/4 cup of flour to the recipe. That will help reduce some of the risk. That said, I love the way the cupcakes come out and while I do sometimes overfill and get some overflow, it doesn’t stop me from eating them and sharing them.


Bake for approximately 22-25 minutes at 350F or until a cake tester comes out clean.
This step sounds easy. It isn’t. It’s where I tend to screw up when I do. For example, I have a working theory that cool spots in the oven cause some of my cupcakes to overflow. This is because the overflowing cupcakes tend to be in one area. I especially see that if I am baking a lot of cupcakes. The ones on the lower rack tend to overflow. So often I will do one of two things, preheat the oven to 375F and drop it to down to 350 once I get them in there. Or I will preheat to 350F but run the convection fan during preheat and for the first 10 minutes of baking. The problem with this (I did it a couple of weeks ago) is if you leave the convection fan on the whole time, the cupcakes will over bake and be crumbly and dry. Normally when you use convection you should drop the temperature down 25 degrees. I also think convection is better for things like cookies or chicken where you want it to get crispy, but doesn’t work so well with cupcakes. It seems like a good way to get rid of unevenness in the oven…. Jury is still out.
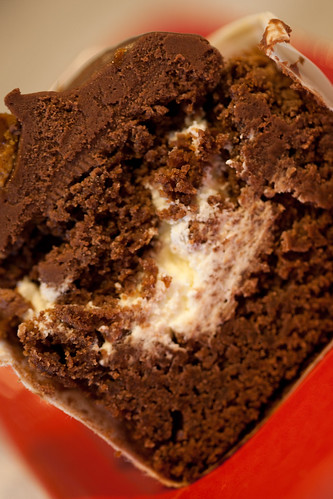
I recommend not disturbing the cupcakes for the first 10-12 minutes. Then I will often rotate the pans also because of the unevenness mentioned above. I start testing at around 22 minutes for this recipe. I think post people use toothpicks as opposed to official “cake testers” but I use an ice pick as that’s what I have on hand. Anything pointy you can stick in there. If you under-bake these cupcakes they will be gummy. If you over-bake them they will be dry and crumbly. So start testing around 22, test every couple of minutes, and try your best to get it right.
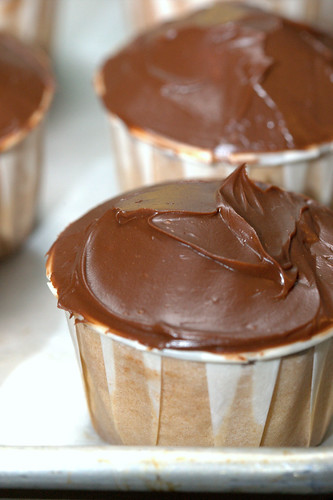
Whew, with any luck you have some gorgeous cupcakes cooling on a wire rack. Now let’s get cracking on the frosting.


Beat 2 sticks of butter until soft.
Pretty much the same thing goes with frosting. It’s way better if your butter comes naturally to room temperature before making frosting. I have tried many shortcuts and they work ok enough, but in my opinion you won’t get as smooth as a frosting otherwise.


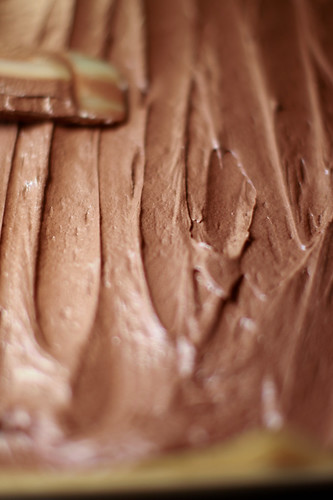
Sift in 3-4 cups of powdered sugar and beat until smooth.
frosting1
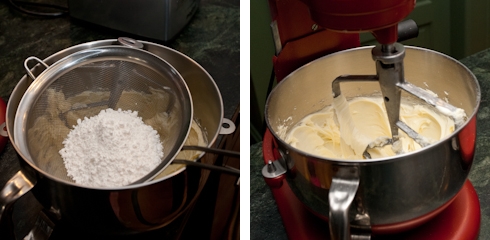
Again, I don’t like sifting, but if I must (and with frosting, you must or it will be lumpy) I will use one of these metal sieves and a spoon. By far the easiest method I have come across. I always start with a good amount of powdered sugar with room for adding more later.


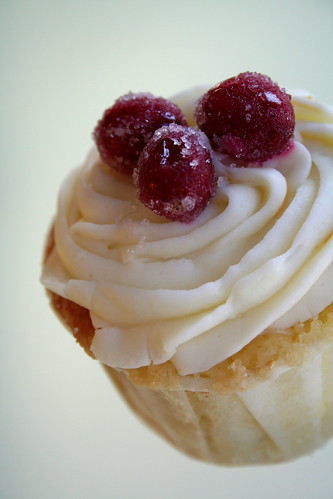
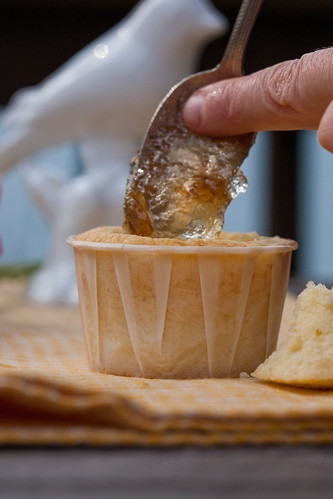
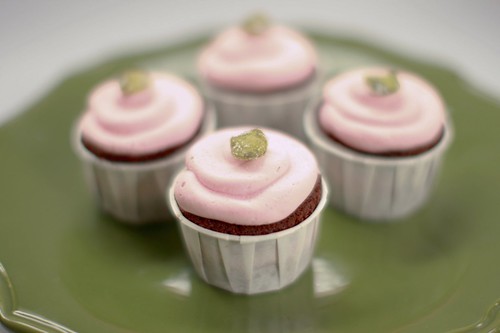
Add 1/4 cup of strawberry puree and beat until combined.
frosting2
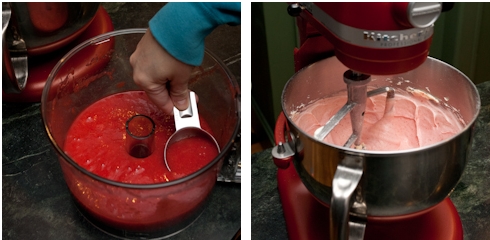
Not much to this except your yellowish frosting turns a pretty pink. Feel free to add a teaspoon of vanilla at this step if you want.


Add more powdered sugar until you get the consistency you like.
When you add a liquid to buttercream it’s hard to get it to a nice thick consistency that is good for photo shoots. You can keep adding powdered sugar, but it won’t help. So minimize the amount of liquid. I went beyond 1/4 cup in one try of this recipe and it was way too much. I never recovered the frosting. It was usable, but runny. If you are anxious about this, omit the puree and just add chopped strawberries. It won’t be as strong a strawberry flavor, but less risk is involved.
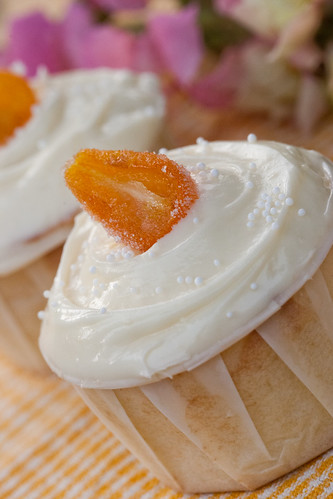
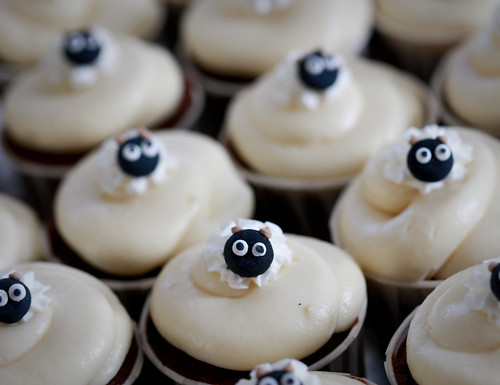
I also made a cream cheese version of the strawberry frosting. If you want to try that substitute 1 8-ounce package of philly cream cheese with 1 of the sticks of butter and don’t add much puree. Stick more to using chopped strawberries as the cream cheese will already make the frosting softer than buttercream.
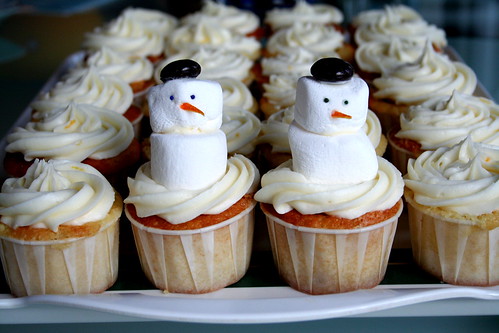
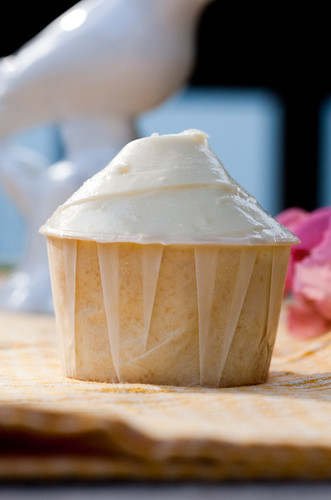
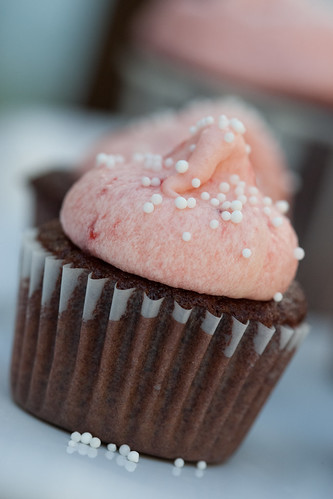
Decorate as usual by either piping the frosting on, scooping it on, whatever works for you. If you pipe, use a tip with a big opening, like 1/2 inch or so.
chocolate cupcakes with strawberry buttercream frosting

Orange Cupcakes with Jasmine Petal Jelly

Posted by chockylit in Citrus,Herbs & Flowers (Sunday March 14, 2010 at 9:41 am)
orange cupcake with jasmine petal jelly and vanilla cream cheese frosting
My daughter inspired this cupcake. I asked her what color and flavor cupcake she wanted and she said orange. So, orange it was. I mulled over what to pair it with. I am not a huge fan of orange with chocolate and I wanted to keep the orange bright tasting – so no spices. A lunchtime trip to the Ferry Building resulted in the purchase of some jellied jasmine flowers. Sounded like a good combo to me.
The cupcakes have a nice and noticeable orange flavor. The jasmine flower jelly doesn’t provide much of a flavor hit, but the sweetness is a nice addition. The vanilla cream cheese frosting provides that anyway in addition to a luscious creaminess. In other words, don’t rush out and by jasmine petal jelly…
I think the orange cupcake is a great foundation to go in a lot of directions – definitely chocolate for those who like that combination, I can see something nutty working well, berries, etc. There are lots of ideas on the Cupcake blog facebook page from readers… They all sound wonderful.
I made some candied kumquats using this method but abbreviated as a topper.
Orange Cupcakes
~28 regular cupcakes / 375 degree oven

1 cup (2 sticks) unsalted butter, room temperature
2 cups sugar
4 large eggs
2-3/4 cups all-purpose flour
1-1/2 teaspoons baking powder
1/8 teaspoon salt
3/4 cup milk
1/4 cup orange juice/pulp from one orange
2 teaspoons orange extract
1/2 teaspoon vanilla extract
zest of one half orange
1. Beat butter on high until soft, about 30 seconds.
2. Add sugar. Beat on medium-high until light and fluffy, about 3 minutes.
3. Add eggs one at a time, beat for 30 seconds between each.
4. Whisk together flour, baking powder, and salt in a bowl.
5. Add about a third of the dry ingredients to the mixing bowl and beat to combine. Add about a half of the milk and beat to combine. Continue adding, alternating between dry and wet and finishing with the dry.
6. Add the orange juice, orange extract, vanilla extract and orange zest, beat to combine.
7. Scoop into cupcake papers about half full.
8. Place cupcakes in the oven and turn the oven down to 350 degrees. Bake for 22-25 minutes until a cake tester comes out clean.
jasmine petal jelly
jasmine petal jelly
jasmine petal jelly filling
filling the cupcakes
Vanilla Cream Cheese Frosting

2 sticks (1 cup) butter, room temperature
1-1/2 packages of Philly cream cheese
3-4 cups sifted powdered sugar
1 teaspoon vanilla extract
1. Beat butter at medium speed until creamy.
2. Add cream cheese and beat until combined.
3. Sift 3 cups of the powdered sugar into the butter and cream cheese. Add the vanilla extract. Beat until combined.
4. Add more sugar until you get to the consistency and sweetness you like. I used 4 cups.
candied kumquats
candied kumquats
Assemble
1. Fill the cooled cupcakes using the cone method.
2. Frost.
3. Top off with candied kumquats or whatever suits you.
cone of frosting
cone of frosting

Pink Salt & Pink Pepper Cupcakes

Posted by chockylit in General (Sunday April 11, 2010 at 10:05 am)

salt & pepper cupcake
These cupcakes sound more challenging to the palate then they are. I think it’s all the chocolate… The foundation of this cupcake includes two basic recipes – chocolate cupcakes and chocolate ganache. I decided to use the low-flour chocolate cupcake recipe I like and to sub out the wheat flour for quinoa flour and make them gluten-free. No one noticed a difference. If you are looking to make gluten-free, this is a great recipe to use. Your gluten-free friends will be very happy.
I really thought this recipe would end up being all concept with no real flavor excitement, but I was wrong. The pink peppercorn cream paired extremely well with the salted toffee. Those two things with the chocolate were just great. A couple of people weren’t into the pepper flavor and just scooped out the filling and ate the rest, but for the most part everyone enjoyed the cupcake. So, I guess whether or not this combination is a challenge to the palate depends on who you are. So far only the wasabi, white chocolate cupcakes I made in 2008 were too much for me…
Gluten-Free Chocolate Cupcakes
~28 regular-sized cupcakes / 350 degree oven
7 ounces (200 grams) Valrhona 85% cacao (or any bittersweet chocolate)
3 sticks (343 grams) butter
2-1/4 cups (445 grams) sugar
8 eggs
1-1/4 cups (180 grams) quinoa flour, gluten-free (or all purpose flour for non-gluten free)
1/4 cup cocoa powder, unsweetened
1-1/2 teaspoons baking powder
1/4 teaspoon salt
1 teaspoon xanthan gum (if using gluten-free flour)
1. Chop the chocolate and transfer into the bowl of a standing mixer.
2. Add the butter to the chocolate and place the bowl over a pan of simmering water. Stir until the chocolate melts and the butter is combined.
3. Remove from heat and stir in the sugar. Let the mixture cool for 10 minutes.
4. Measure out the flour, cocoa, baking powder, salt, and xanthan gum (if using) into a medium-sized bowl. Whisk together.
5. Transfer the cooled chocolate/butter mixture to the electric mixer and beat for 3 minutes.
6. Add one egg at a time, mixing for 10 seconds between each.
7. Add the flour mixture and mix to combine.
8. Scoop into cupcake cups only 2/3s full. Bake all the cupcakes at 350 F for 25 minutes or until a toothpick comes out clean.
Note: If the oven is not hot enough than these cupcakes may over-flow. One way to be safe is to either fill 2/3′s full or another trick I use is to preheat to 375, then drop the heat to 350 once I put the cupcakes in. I also rotate the pans after 15 minutes of baking. It is safe to gently move them at that point and I find the lower back of my oven to be a bit cooler.
Chocolate Ganache

9 ounces bittersweet chocolate like Valrhona 61% cocao
1 cup heavy cream
1 teaspoon vanilla
1 tablespoon butter
2 cups powdered sugar
1. Chop chocolate and transfer into the bowl of your standing mixer.
2. Heat cream until bubbles form around the edge of the pan, pour cream over the chocolate.
3. Let sit for 1 minute then stir until combined.
4. Add vanilla and butter. Stir until butter is melted. Let cool to room temperature.
5. Sift the powdered sugar into the bowl and mix until fluffy.
salt & pepper cupcake
filled cupcake
Pink Peppercorn Cream

1 cup heavy cream
2 tablespoons sugar
pink peppercorn
1. Whisk cream until soft peaks form. Add sugar and whisk until combined.
2. Add grindings of the pepper tasting occasionally until you are happy with it. I made it fairly strong as its a small component to the cupcake and will otherwise get overpowered by the chocolate.
toffee in the making
Salted Toffee

3/4 cup heavy cream
1 tablespoon water
1 cup sugar
1-2 tablespoons large grained salt
1. In a medium saucepan over medium-high heat, bring everything to a boil. Stir until the sugar is dissolved.
2. The mixture will start to boil with vigor. Do not stir. Let the mixture boil over medium-low heat until the mixture turns a deep nutty brown, about 20 minutes
3. Pour on to a prepared baking sheet (either covered in a silpat or oiled parchment paper). After a minute or so, sprinkle with salt. I used pink, Hawaiian salt.
4. Leave it to cool.
5. After the toffee has cooled, break it into small chunks.
Note: I like my toffee very dark – almost burnt. Getting the toffee just right for your taste can be a challenge. I think a nutty brown is a good place to start. One additional warning, if you cook it very long you could nearly ruin your pan or at a minimum create bunch of cleanup work for yourself. Don’t use your favorite pot or pan!
pink salt(ed) toffee
salted toffee
Assemble
1. Fill the cooled cupcakes using the cone method.
2. Frost.
3. Top off with the toffee chunks, a little more salt (if desired), and a decoration (if you want).
salt & pepper cupcake

Baking in Bulk

Posted by chockylit in General (Monday June 21, 2010 at 9:37 pm)
lots of tiny sheep
I rarely if ever veer from the standard post of recipe with pictures. I don’t do book reviews, product reviews, talk about cupcakes in general, etc. This blog is about recipes I create and pictures that go along with them. I am veering with this post though.
I baked for an event a month or so back and I had been thinking about posting just about that process. As I would heartily recommend to you, when baking for an event I stick to what I know. So, there are no new recipes or experiments to share – just the process that I go through when baking in bulk for events.
I decided to bake for an event for my daughter’s preschool (even though she doesn’t officially start until September). The event was a country fair and the highlight would be the sheering of the two school sheep. (Yes, there is a school in the middle of San Francisco with two sheep…) This is the basic process I followed and have followed in the past.
Step 1: Find inspiration and come up with a high level plan
Whenever I am asked to or offer to bake for an event, I always look for at least one bit of of inspiration. If the event is for a person, I might ask their favorite color. Or if I know the person well, I will use whatever color I associate with them. I will look to something special about the event for inspiration. Is it themed for example. Flavor-wise I tend to just ask – are you a chocolate person? What’s your favorite fruit? Spice? Etc.
In this case, my starting point was sheep. So I did some googling and came across the PERFECT little sheep already done up for me in royal icing. I wanted to have both a chocolate and non-chocolate cupcake and something color-wise to contrast. I thought brown plus green would be a nice combo, so I quickly settled on vanilla cupcakes with green tea frosting and chocolate cupcakes with salted caramel frosting. The wonderful ebay shop owner, Lisa, hooked me up with a custom order and made up a bunch of sheep and birds shipped individually packaged and shipped all the way from the UK. The school also has chickens, but I settled for birds as I knew she could make them.
Step 2: Write out all your recipes
At a minimum you should print out all your recipes with the correct quantities. I also recommend writing them out as this ensures you read the recipe through and orients you to the steps involved, the equipment you will need, etc. I tend to write out my recipes like this and cross things out as I do them so I don’t forget. Most standard cupcake recipes make 24 or so cupcakes – at least on my blog. Sometimes I will halve them and make only 12. Usually for events you are baking a lot of cupcakes. This is where it gets tricky for the home baker. You really should make NO more then 30 to 36 at a time. Most mixers can’t accommodate more batter than that and you don’t want to over stuff the home oven. So do know that if you are making 100 cupcakes you likely have to make them in 3 batches. Professionals have quite an edge with their jumbo mixers and large, commercial convection ovens. Baking in bulk at home is a pain and I really try to avoid it. That said, I do occasionally give in…
When changing the quantities of a recipe start with the eggs. If there are 3 eggs in the recipe don’t halve the recipe for example. Either multiply everything by 1/3 or 2/3s. Regardless, get ready to do some fractions. Google can also help with this. Just be careful, check your math, and write everything down clearly.
iphone_pic
Step 3: Prepare a plan and your ingredients
Now that you have your recipes you need to write down your shopping list and come up with a plan of action. The shopping list is pretty easy. So I won’t cover that, although I do write out my shopping lists in the order in which I will come across the ingredients at the grocery store – but that’s me – and I am a bit anal about being “efficient”. The important thing is to plan what you will bake when. If you are an amateur baker such as myself, you likely have a demanding full-time job and/or have a family to take care of. So it’s likely you won’t have the large swath of free time it will take to get something like this done in one go.
I always start from the time of the event. I like to leave assembly for the day of the event and usually leave an hour or two for assembly and packing assuming I am making 100 or so cupcakes. If the event is at 11am on a weekend for example, plan on getting up early and focusing on assembly. If the event is in the afternoon, say 3 or so, you can plan on finishing up some recipes the morning off. Regardless, leave plenty of buffer for unexpected events. This will definitely help minimize stress.
This event was on Saturday at 11am, so I wouldn’t have the weekend to work and would just have the morning to assemble. I had to bake after work during the week (my least favorite time). I try to spread the work out as much as I can without having to resort to freezing anything. Buttercream and chocolate ganache frostings can store in the fridge well covered up to three days. Cupcakes also store in the fridge well covered up to three days, but I like to bake them as close to the event as I can. So, I tend to do the frostings first. One note: meringue frostings don’t store well. So forgo them when you are doing a large project.
I always try to fill and frost the day of the event if I can, the night before if its for very early in the morning or I am taking them to work. In this case I started on Wednesday with frostings, made a batch of cupcakes Thursday, and another on Friday. I assembled on Saturday morning. I purposefully didn’t make these filled cupcakes as that basically doubles the work involved. Making the fillings takes more time, but doing the actual filling can be very time-consuming. I have filled cupcakes when making about 120 or so once, but it was for a wedding and it was before I had a child and other demands on my time. In those days I could spend the entire weekend in the kitchen without a second thought. Those days are over… Take on what you can manage without causing undo stress.
Step 4: Prepare all the recipes and store them for final assembly
A bit earlier I recommended baking in 30 to 36 cupcake batches in order to avoid disaster. I still recommend that. I rarely heed my own advice and made 2 batches with about 46 cupcakes in each batch. I have a larger sized mixer, but it was still a challenge. Don’t even attempt doubling a standard recipe if you don’t have a 6-quart mixer.
I managed the over-stuffing of the oven by starting off the baking at 375 with the convection fan on. You just have to be careful to lower the temp and/or turn off the convection at the right time. And the right time is pretty hard to determine. I usually turn the oven back down to 350 after a few minutes and turn off convection around 12 minutes. I find if the oven isn’t hot enough the cupcakes tend to overflow. But really, you should just bake in batches of 30 to 36 (which is about 1.5 times a normal recipe you see on my blog). The last thing you want after all that work and all those ingredients is a bunch of overflowed cupcakes. A couple is fine – that happens to me and those cupcakes tend to be the taste testers. On that note, always make more than you absolutely need. In this case, I was aiming for a number but had flexibility.
Like I mentioned, I absolutely recommend baking and storing for assembly as close to the event as possible. If you can do it all in one day, great. But for me and perhaps many of you, it’s not possible. With the frostings, I tend to just transfer the frosting into a bowl and wrap well with plastic wrap and store it in the fridge. With the cupcakes, I let them cool all the way off then put them back on a sheet pan and wrap that very well with plastic wrap. If you have enough tupperware to store all your cupcakes even better, but I don’t. If you must bake more then 3 to 4 days before the event you can freeze them (I wrap them in plastic wrap in small quantities that can fit in freezer bags) but there will be some dryness after thawing. So I recommend not doing it.
4-pack
Step 5: Assemble, pack for delivery, unpack and present
I won’t cover assembly much other then watch for cupcake toppers that will work for your event. For example, fresh fruit doesn’t hold up very well. It can dribble juice on your cupcake or start to look old. Candied fruit works as do sugar toppers. I tend to top my cupcakes with something simple that alludes to the flavor of the cupcake, but for some events – like a kids fair – I will do (or purchase) a more typical decoration.
I pack all my cupcakes in cupcake boxes with inserts that have individual holes for each cupcake. I bought the boxes in bulk (about 200 boxes) and it will be a while until I will run out. But many places sell paper or plastic cupcake containers in smaller quantities. I recommend going for a good box as it will help hold them in place and avoid delivery disaster. You will still need to watch for bumps in the road, but not have to worry about sliding. I also stick with disposable boxes for events given I have found it difficult to get my more permanent containers back promptly. Its totally up to you, just pack them carefully so they arrive safely.
Lastly, you may need to think about display. Thankfully there are many sites out there that have both disposable and non-disposable tiered cupcake holders. I also had a vintage, wood cupcake stand that I used for a few events. Usually its a challenge to get more then 30 or so cupcakes on these things, unless they are monstrous. I tend to put what I can on the tiered display and fill out the rest on the table around it. For this event I new I would have a hard time getting anything back given we hadn’t started at the school, so I settled for a something disposable.
matcha frosting with tiny bird
Well, that is all that came to mind. If anyone has any questions around something I may have missed, feel free to post it. I might have missed something…

Watermelon-Chocolate Ice Cream Cupcakes

Posted by chockylit in Chocolate,Watermelon (Sunday August 15, 2010 at 3:00 pm)

watermelon-chocolate ice cream cupcakes
It’s summer. And in most parts of the US when it is summer, it is warm. Maybe even *hot*. In San Francisco, it’s foggy, drizzly, and 55 degrees. Despite the fact that I have to wear a jacket and scarf when heading out in the morning, I am still thinking of summery things – like ice cream. I have been itching to make an ice cream cupcake and finally got around to it this weekend.
I have done these before – yummy concoctions consisting of layers of cake, ice cream, and frosting – but for my two previous attempts, I made my own ice cream or sorbet. This time around I was hoping to be inspired by my favorite ice cream shop – Humphry Slocombe.
humphry slocombe sorbet for the latest cupcake project
Humphry Slocombe is walking distance from my house. For a while there Naomi and I would head over just about every other Saturday for a cone. We stopped by Friday evening to pick up a couple pints for the cupcake project. (It’s a good time to go, around 6pm on a weekday, there is no line…) The color of the salted watermelon sorbet immediately caught my eye. I confirmed with the guy behind the counter that the fudgsicle sorbet would pair well – he had tasted the combination earlier in the day.
Indeed this cupcake combo is a winner. I am surprisingly pleased with how the watermelon buttercream frosting turned out and the watermelon-chocolate combination, even with a hint of salt, is wonderfully tasty. It feels like summer almost!
The recipes below will make you 12 to 14 ice cream cupcakes with some ice cream and frosting left over.
Chocolate Cake
1 sheet pan / 350 degree oven
1/2 cup (1 stick) butter, room temp
1 cup + 2 tablespoons sugar
2 large eggs, room temp
3/4 cup flour
1/2 teaspoon baking powder
1/4 teaspoon baking soda
1/8 teaspoon salt
1/2 cup high quality unsweetened cocoa powder like Valrhona brand
1/2 cup milk
1 teaspoon vanilla
1. Beat butter until softened. Add sugar and beat until light and fluffy, about 2 minutes.
2 Add eggs one at a time and beat until well combined.
3. Measure the flour, baking powder, baking soda, salt, and cocoa powder into a small sized bowl and whisk to combine.
4. Measure out the milk and vanilla and stir to combine.
5. Add about a third of the dry ingredients to the butter/sugar and beat to combine. Add about a half of the milk/vanilla and beat to combine. Continue adding, alternating between dry and wet and finishing with the dry.
6. Spread the batter evenly onto a sheet pan that has been covered in parchment paper and greased well with butter.
7. Bake for about 20-22 minutes or until a cake tester comes out clean.
Note: Let the cake cool fully in the pan. After about 30 minutes, I flipped the cake on to a second sheet pan and then removed the parchment paper. This seemed to make it easier to cut the rounds, but may have been unnecessary.
smoothing out batter
Watermelon Syrup
~ 2 cups fresh watermelon meat
1. Peel and chop the fresh, seedless watermelon.
2. Using a blender or food processor puree the watermelon.
3. Separate at least 2/3 cup watermelon juice from the pulp by pressing it through a metal sieve.
4. Bring at least 2/3 cup of watermelon juice to boil over medium heat. Reduce to a simmer and boil the juice for about 10-15 minutes or until reduced by almost half.
5. Once again separate the juice from any solids by pouring the a metal sieve. Allow to cool.
peeling fresh watermelon
Watermelon Buttercream Frosting
2 sticks (1 cup) unsalted butter, room temperature
4-5 cups powdered sugar
1/4 cup watermelon syrup
1. Using an electric mixer, beat the butter at medium speed until creamy.
2. Add 2 cups of powdered sugar and beat, occasionally stopping to scrape the sides and bottom of the bowl, until light and fluffy.
3. Add watermelon syrup and beat to combine.
4. Add more powdered sugar to arrive at the consistency and sweetness you like.
[optional] Add pink food coloring and beat to combine.
Candied Watermelon Rind Rounds
leftover watermelon rind
1/2 cup sugar
1/4 cup water
1. Using a small circle cookie cutter (about 1/2″ diameter) stamp out 14-16 watermelon rind rounds.
2. In a small saucepan combine the sugar and water and bring to a boil.
3. Add the rounds, reduce heat to low, and cook for about 10 minutes.
4. Take off the heat and let sit for about 5 minutes.
5. Remove the rounds and place on a wire grate to cool.
6. After cooled, roll the rounds in sugar.
stamping out circles
Assemble
Something like this setwill come in handy when making these sorts of cupcakes. As will the type of cupcake papers I use. You will also need room in your freezer to freeze the cupcakes in between steps.
1. Find the right sized cutter to get a cupcake round for the bottom and top of the cupcake. I had to use to very different sized cutters.
2. Eyeball how many cupcakes you can get out of the sheet pan before you start cutting. I eyeballed about 14 which is what I got.
3. Stamp out the bottoms and tops.
4. Fill each cupcake paper with a bottom round of cake.
5. Take your first ice cream flavor out of the freezer and transfer it into a bowl. Mix it with a wooden spoon to soften.
6. Scoop a small scoop of ice cream into each cupcake. Smooth out with the back of a spoon. Transfer the cupcakes to the freezer to chill for 20-30 minutes.
7. Now repeat with the second ice cream flavor and chill again for about 10 minutes.
8. Now top with the last cupcake round and chill again for 10 or so minutes.
9. Now top with buttercream frosting and a candied watermelon rind round.
Note: Store cupcakes in the freezer. Let them sit at room temperature for 10 or so minutes before serving. Firm ice cream works best for these projects otherwise the ice cream gets very melty…
ice cream cupcake cross section